
According to what I promised on my Reto Porteño blog, I am going to show you how I solve a sketch. This one I will be using today is by Emma Stafrace from Page Drafts and it was published on a "challenge blog" called Paper Stories Store

Tengan en cuenta que las plantillas
1. Son meramente una guía para poder ubicar mejor nuestras fotos, papeles y adornos. No hace falta respetarlas a rajatabla!!
2. Pueden utilizarse horizontal o verticalmente:
Take into account that sketches
1. Are merely a guide as to how to place our photos, papers and embellishments. They don´t need to be respected 100%!
2. They can be used horizontally or vertically

1. Qué es lo primero que hago? Pensar qué fotos voy a usar ya que estas determinarán el color del papel que usaré.
1. What is the first thing I do? I choose the photographs I will be using since these will determine the colour of the paper I will use
2. Miro el esquema: Qué veo? Yo elegí la orientación de la izquierda y lo que veo es un papel de fondo liso y un centro focal demarcado por líneas verticales que cruzan la página de arriba a abajo.
2. I look at the sketch. What do I see? I chose the sketch on the left and I saw a solid background and a focal point defined by vertical lines which cross the page from top to bottom
3. Elegí trabajar sobre un papel liso (amo los fondos lisos!)
Los estampados que marcan el centro focal y que yo numeré 1-2-3-4-5 y 6 forman parte del fondo
Es la primera parte del diseño que construiré.
Para hacerlo cuento con múltiples recursos:
a. papeles estampados (lo más sencillo)
b. cintas
c. puntilla
d. stencil con modelling paste o con pintura
e. salpicado con pintura acrílica y el cepillo de dientes
f. sellos o transferencias
g. géneros
h. dibujos con marcador negro ( ahora se conocen como zentangles)
i. gofrados ( en inglés: embossing)
j. pintura
k. cualquier técnica adicional que puedan imaginar
I chose to work on a solid background. (I love solid backgrounds!)
The printed strips which define the focal point and which I numbered 1-2-3-4-5 and 6 form part of the background. This is the first part of the design I will look into.
To solve this I have multiple resources:
a. printed papers ( the easiest!)
b. ribbons
c. lace
d. stencils used with paint or modelling paste
e. splashing with a toothbrush and acrylic paint ( no spray paint in Argentina, sorry!!)
f. stamps or transfers
g. fabric
h. drawings with pen and ink even those known as zentangles
i. embossing
j. painting
k. any additional technique you can imagine!
Yo decidí marcar la línea vertical con sellos, utilizando la técnica que explico en mi blog aquí
Al sello este lo armé en Word, con cuadros de texto, hace ya un tiempo y lo he utilizado en múltiples oportunidades
I decided I would use stamps to define the vertical line. Because stamps are not readily available in my country I used a technique which I explain on a video you can see here:

Quise también usar otro recurso y se me ocurrió GOFRAR ( alias:"embossar") el papel. Para esto no hace falta tener la Cuttlebug o la Big Shot!! Sólo precisan un lindo stencil! Al mío lo compré en La Aldea en una de las tantas expos. Deben proceder así:
Toman el stencil y lo apoyan sobre una ventana
Toman el papel y apoyan el derecho del mismo sobre el stencil
Con un bolillo van dibujando todo el contorno haciendo presión contra los cantos del diseño:
I also decided I wanted to use embossing. To do this it's not necessary to have a Cuttlebug or Big Shot machine. You just need a pretty stencil. Do the following:
Take the chosen stencil and place it against a window. Then take the paper you want to emboss and place it over the stencil, right side facing the stencil. Then take a stylus and start outlining each of the images placing a little pressure on the outline as you do it. Take care not to tear tha paper!

Así se ve el dorso del papel una vez terminado
This is what the back side of your paper will look like once you have finished
This is what the back side of your paper will look like once you have finished

Y así se ve el frente:
And this is the right side

Listo, con esto resolví las partes que en el esquema numeré 1 y 2
Ahora, como resolví las numeradas 4 y 5?
Bueno, en vez de utilizar papeles se me ocurrió marcar esas líneas verticales con hilo encerado.
Así que coloqué unos ojalillos y enhebré hilo a través de los mismos para seguir marcando esa "verticalidad"que define la plantilla:
Right, I have now solved the first part which is what I labelled 1 and 2 on Emma's original sketch
( see way above)
Now, how did I solve parts 4 and 5? Well...instead of using paper I decided to define those vertical lines using twine. So I placed some eyelets on my page and then threaded twine through them

Aquí es donde es muy importante tambén definir el tamaño de las fotos. Siempre tengo a mano unos cartoncitos que miden 10 x 15cm (tamaño clásico de revelado), 10 x 7,5cm ( media foto de 10 x 15) y 7,5 x 5 cm ( un cuarto de foto 10 x 15). Me ayudan a la hora de planear mis hojas
ES MUY IMPORTANTE QUE EL TAMAÑO DE LAS FOTOS SE ADECÚE A LA PLANTILLA! SI MODIFICAN ESTAS MEDIDAS, EL DISEÑO SE DESEQUILIBRA!!
En este caso particular podrían optar por poner:
a: tres fotos (como se ve arriba)
b: dos fotos, una de 7,5 x 5 y la otra de 7,5 x 10 ó
c: en el último de los casos, una de aproximadamente 7,5cm x 15cm
Next step is defining the size of the photographs. I always keep a couple of pieces of cardboard cut to the classic photograph sizes: 10 x 15 cm ( 4 x 6in) 10 x 7.5cm ( 4 x 3in) and 7.5 x 5cm ( 3 x 2in). These help me plan my layouts.
IT IS VERY IMPORTANT THAT THE SIZE OF YOUR PHOTOGRAPHS MATCH THOSE ON THE SKETCH. IF YOU MODIFY THESE MEASUREMENTS THE DESIGN LOSES BALANCE!!
In this particular case you could choose:
a. Three photos as in the original sketch 7.5 x 5cm / 3 x 2in
b. Two photographs, one 10 x 7.5cm / 4 x 3in and the other 7.5 x 5cm / 3 x 2in
c. One photograph 7,5cm x 15cm ( 3in x 6in)
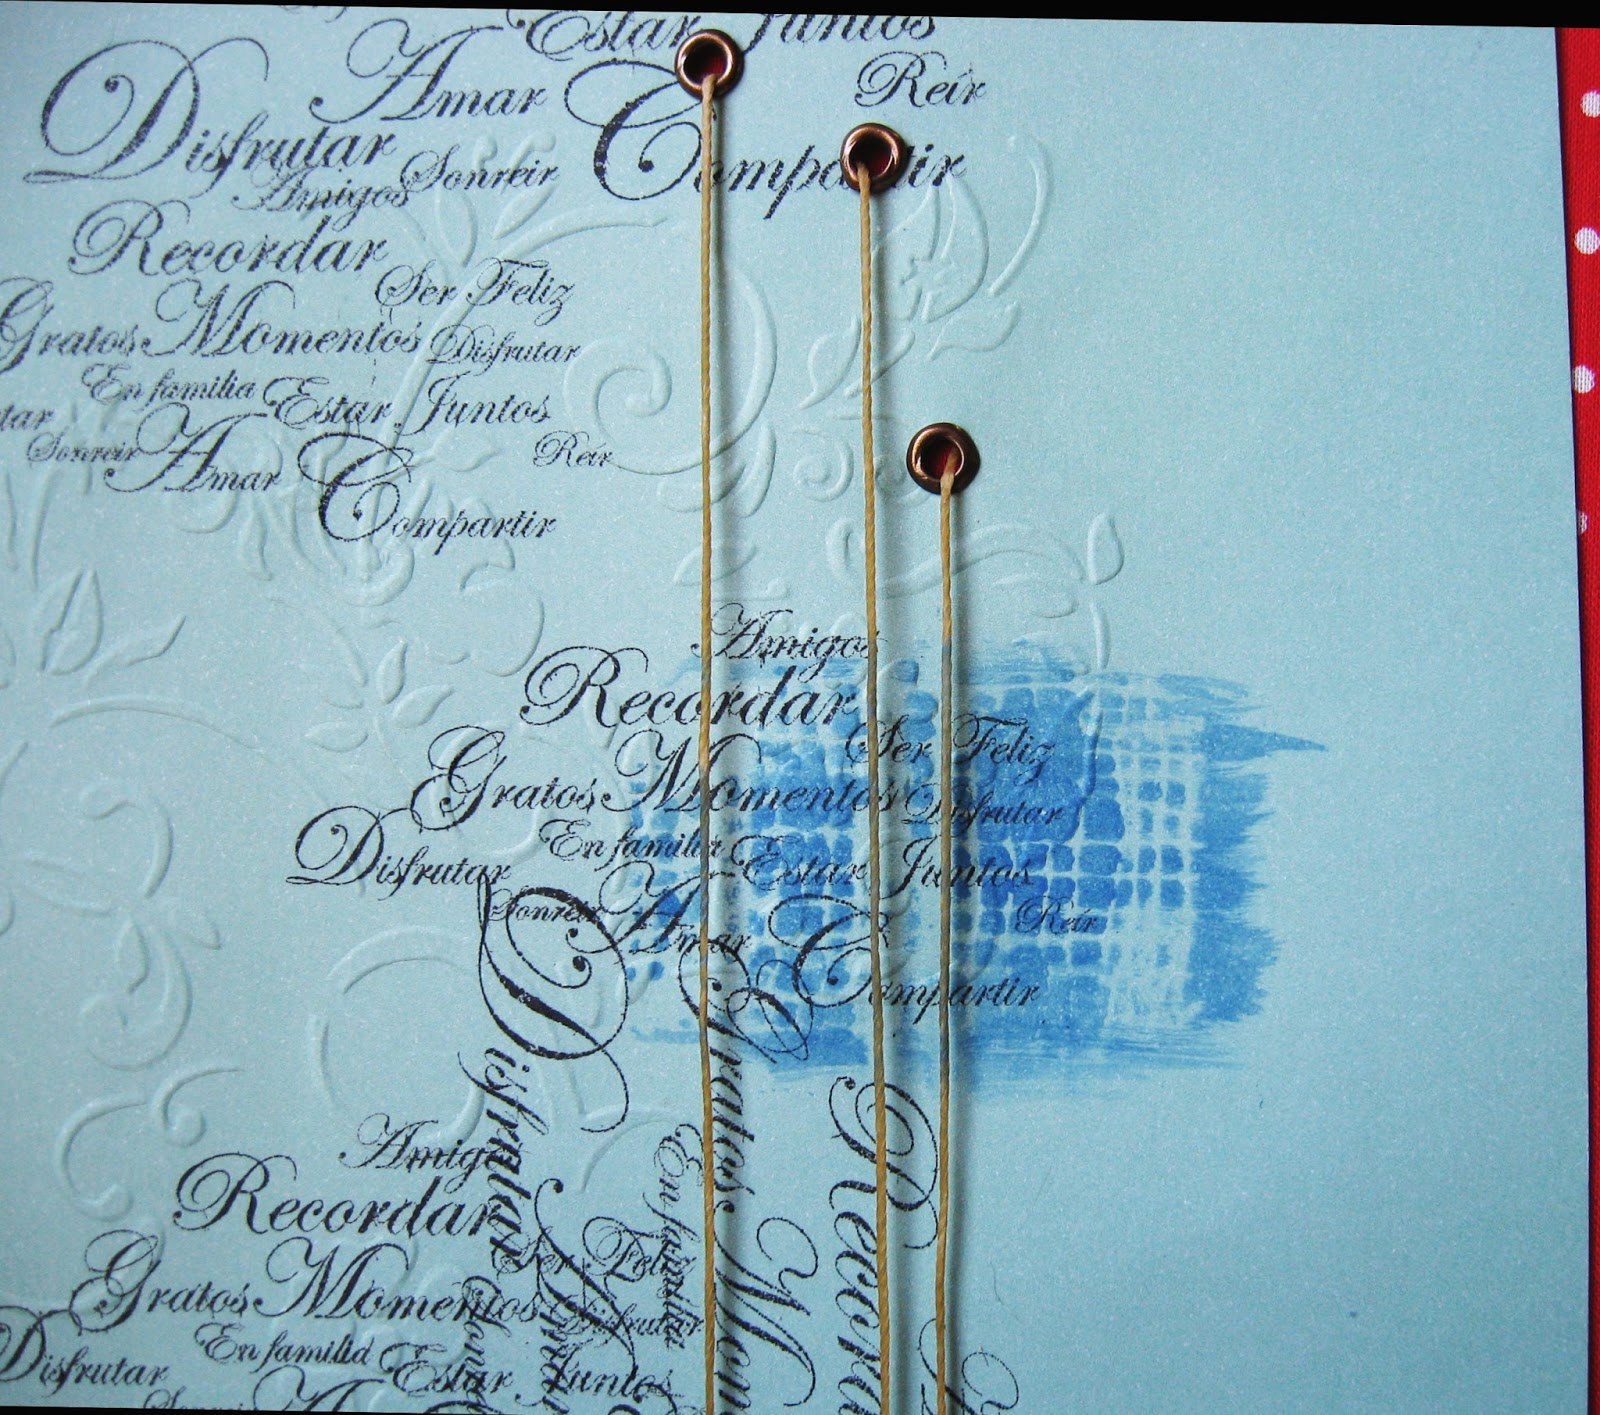
Para la tira # 3 decidí usar una cinta tipo red. Como la que tenía era del color equivocado la pinté con acrílico:
For strip # 3 I decided to use a strip of sinamay ribbon. The piece I had was the wrong colour so I painted it with acrylics

Cuando levanté la cinta me había quedado esta mancha sobre la hoja. Me encantó!!! Pensé que sería una buena idea utilizar esta técnica para resolver la tira que numeré 6.
When I picked the ribbon up there was this nice pattern on the piece of scrap paper I had used to paint on and protect the table. I loved it!! Thought it would be a great idea to use for strip #6

Y pinté! Pero........no me quedó prolijo como quería!
So I painted a bit more! But......I thought it looked untidy!
Entonces pinte la misma mancha sobre una tira color marfil, le oscurecí los bordes con acrílico y una esponjita y la pegué cubriendo el "error"anterior! Quedó así:
So I painted the same pattern onto an ivory coloured strip of paper, darkened the sides with a bit of acrylic paint and stuck it on the paper covering what I had previously done!
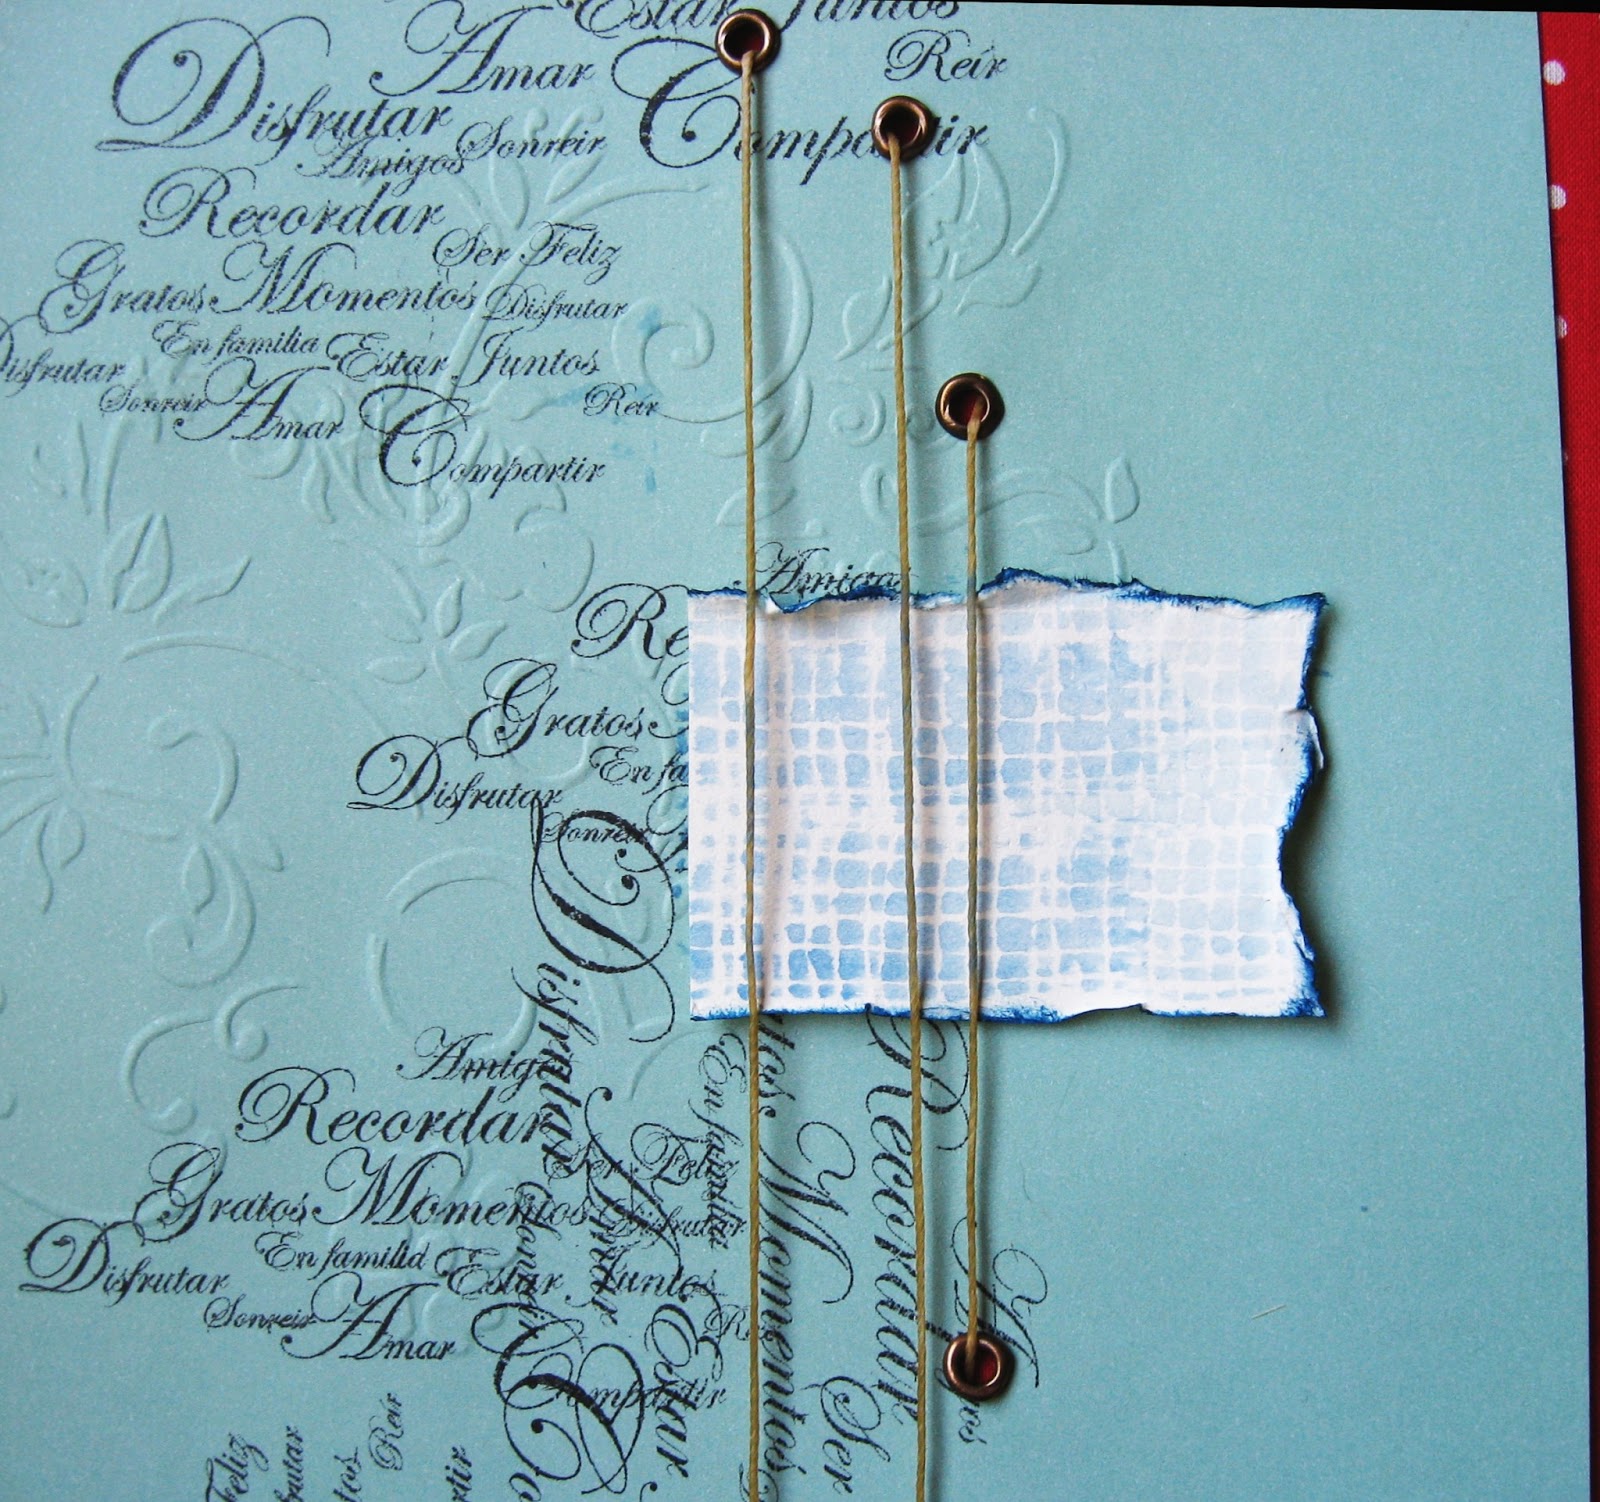
Mucho mejor!!!
Y para finalizar, pegué la cinta pintada, un papel estampado y unos banderines para la sección que numeré: 3
A lot better!!
Finished off the vertical section numbered 3 by adding a strip of printed paper and a few banners

Y....listo mi fondo! pegué entonces las fotos en su lugar y el trabajo terminado quedó así:
Backgroud finished! Added the photos and this is the finished LO:

Ahora solo falta que les cuente como armé los adornos
Fíjense que a los grupos de adornos que estan marcados en la plantilla original los reemplazé por trocitos de foto. Como estas fotos están tomadas en el campo, aproveche el molino y un pedazo de alambrado:
Now just a few more lines about how I put together my embellishments. The clusters Emma placed on her sketch I replaced by bits of a photograph I chopped up. The photographs on the layout were taken on the farm so I thought using a picture of the windmill and a piece of of the fence would be a good idea

Como quería que se pudiera apreciar el trabajo de los sellos y del gofrado, imprimí el título sobre una transparencia y pinté las letras con acrílico. Sostuve la transparencia a la hoja con hilo encerado, enhebrado a través de ojalillos. Esto lo hice además para reemplazar las flechas que se ven en la plantilla original. Agregué el texto sobre una etiqueta
Since I wanted the embossing and the stamping I had used on the background to be seen, I printed my title on a transparency and then painted the letters with acrylic. I tied the transparency to the page with more twine threaded through eyelets. The idea was also to use this twine to replace the arrows Emma placed on the original sketch. I added my text on a label

Y también unos detalles: tachas y hojitas:
Also some small details: leaves and brads

Después me encontré con que se me había manchado con acrílico el borde de la hoja. Uyyy!!!
Then I discovered I had stained my background paper with a spot of acrylic paint. Oooops!

Pero.....como en scrapbooking todo tiene siempre solución, lo tapé con estos detallitos!
But since there is always a way of solving mistakes when scrapbooking I covered up the mess with these small details

Y listo un LO más para el álbum de Floppy!
Ahora quiero ver las creaciones de todas en el Reto Porteño!!!
Nos vemos!
Ready! One more layout for Floppy's album!
Thanks for visiting! See you soon!
sin palabraaaasss!!!!!! sos una verdadera genia del scrap.....y siempre te repito lo mismo: sos tan generosa con los conocimientos!!!! cada vez que veo algo tuyo, aprendo algo nuevo!!! gracias!!!
ResponderEliminarHermosa explicación Elain!! En este reto espero poder participar!!! Besote!!!
ResponderEliminarHermosa explicación Elain!! En este reto espero poder participar!!! Besote!!!
ResponderEliminarCuántos tips hermosos! Muchas gracias!!!
ResponderEliminarElain por algo sos una PROFE con mayúsculas porque nos enseñas, compartís y sobre todo nos haces usar aquello que tenemos a mano sin necesidad de contar con un sin fin de máquinas.- Besos enormes y muchas muchas GRACIAS
ResponderEliminarPero que buen tip para el embossing... lo voy a intentar. Me gusta mucho el resultado de tu interpretación, te queda simplemente precioso¡¡ =D
ResponderEliminarMe encantó como hiciste el embossing en forma "casera". Sin máquinas al estilo porteño!!!! si no hay lo inventamos con lo que tenemos. Muy lindo, precioso!!!! besos
ResponderEliminarEs primera vez que paso por aqui y quedé prendadisima de tus consejos!!! Wow! muchos tips en un solo post! me encantó todo! y el resultado final magnifico! Ya soy tu seguidora! ;)
ResponderEliminarSaludos desde Venezuela!!!!
Elena gracias ,espectacular la explicacion
ResponderEliminarMil gracias! ya mismo me pongo a buscar mis fotos y hacer este hermoso trabajo!
ResponderEliminarOh wow what a fabulous tutorial Elaine, loved seeing the process. xox
ResponderEliminarSOS UNA GENIA ELENA... gracias por compartir todos tus conocimiento con nosotras !!!!
ResponderEliminarGracias Elena, muy buena la explicación !!!
ResponderEliminarGracias Elena por esa explicación tan clara, hermoso quedo tu ptoyecto!
ResponderEliminarHola Elaine, mil gracias por tus tutoriales y por el tiempo que has tomado en crearlos!!! Son fantásticos y felicidades por el matrimonio de tu hija del medio. Imagino la alegria que habrás vivido haciendo ese hermoso vestido de novia!!!! Li. Dorada.
ResponderEliminarHOla Elena! Pude poner en práctica la técnica del hilo encerado y los ojalillos metálicos! me encantó!!! En realidad todo me gusta! pero quería contarle mi satisfacción con esa técnica! besosss y graciassss
ResponderEliminarUna genia! Qué éxito! Quedo siempre muy a gusto y satisfecha con tus consejos! Nos vemos Dios mediante en el Reto 3. Cariños!
ResponderEliminarME QUEDÉ BOQUIABIERTA.... TAN ELABORADO QUE SE VE Y TUS EXPLICACIONES LO HACEN TAN SENCILLO... MIL GRACIAS POR COMPARTIR TANTO CONOCIMIENTOS... FELICIDADES Y MIL BENDICIONES... SALUDOS CARIÑOSOS DESDE VENEZUELA
ResponderEliminar